

Introducing the Electron E1 EVK
Unlock ultra-efficient innovation with the new Electron E1 EVK—ready-to-use platform for building, testing, and optimizing on the Electron E1 processor.
When energy is no longer the tradeoff, what will you create?
The Electron E1 is powered by our Fabric architecture, a spatial dataflow design that eliminates the bottlenecks of traditional step-by-step execution. Developers still get the familiar programming experience they expect—but with dramatically higher energy efficiency.
The E1 EVK is designed to make it as easy as possible to explore that potential. Whether you’re bringing up new firmware, running power characterization, or porting existing software, the EVK provides:
- A plug-and-play development workflow
- Built-in energy instrumentation
- Arduino-compatible expansion
- Multiple power options for real-world scenarios
- A complete SDK and quick-start documentation
.avif)
Product documentation
When energy is no longer the tradeoff, what will you create?
Electron E1 EVK jumper/switch map
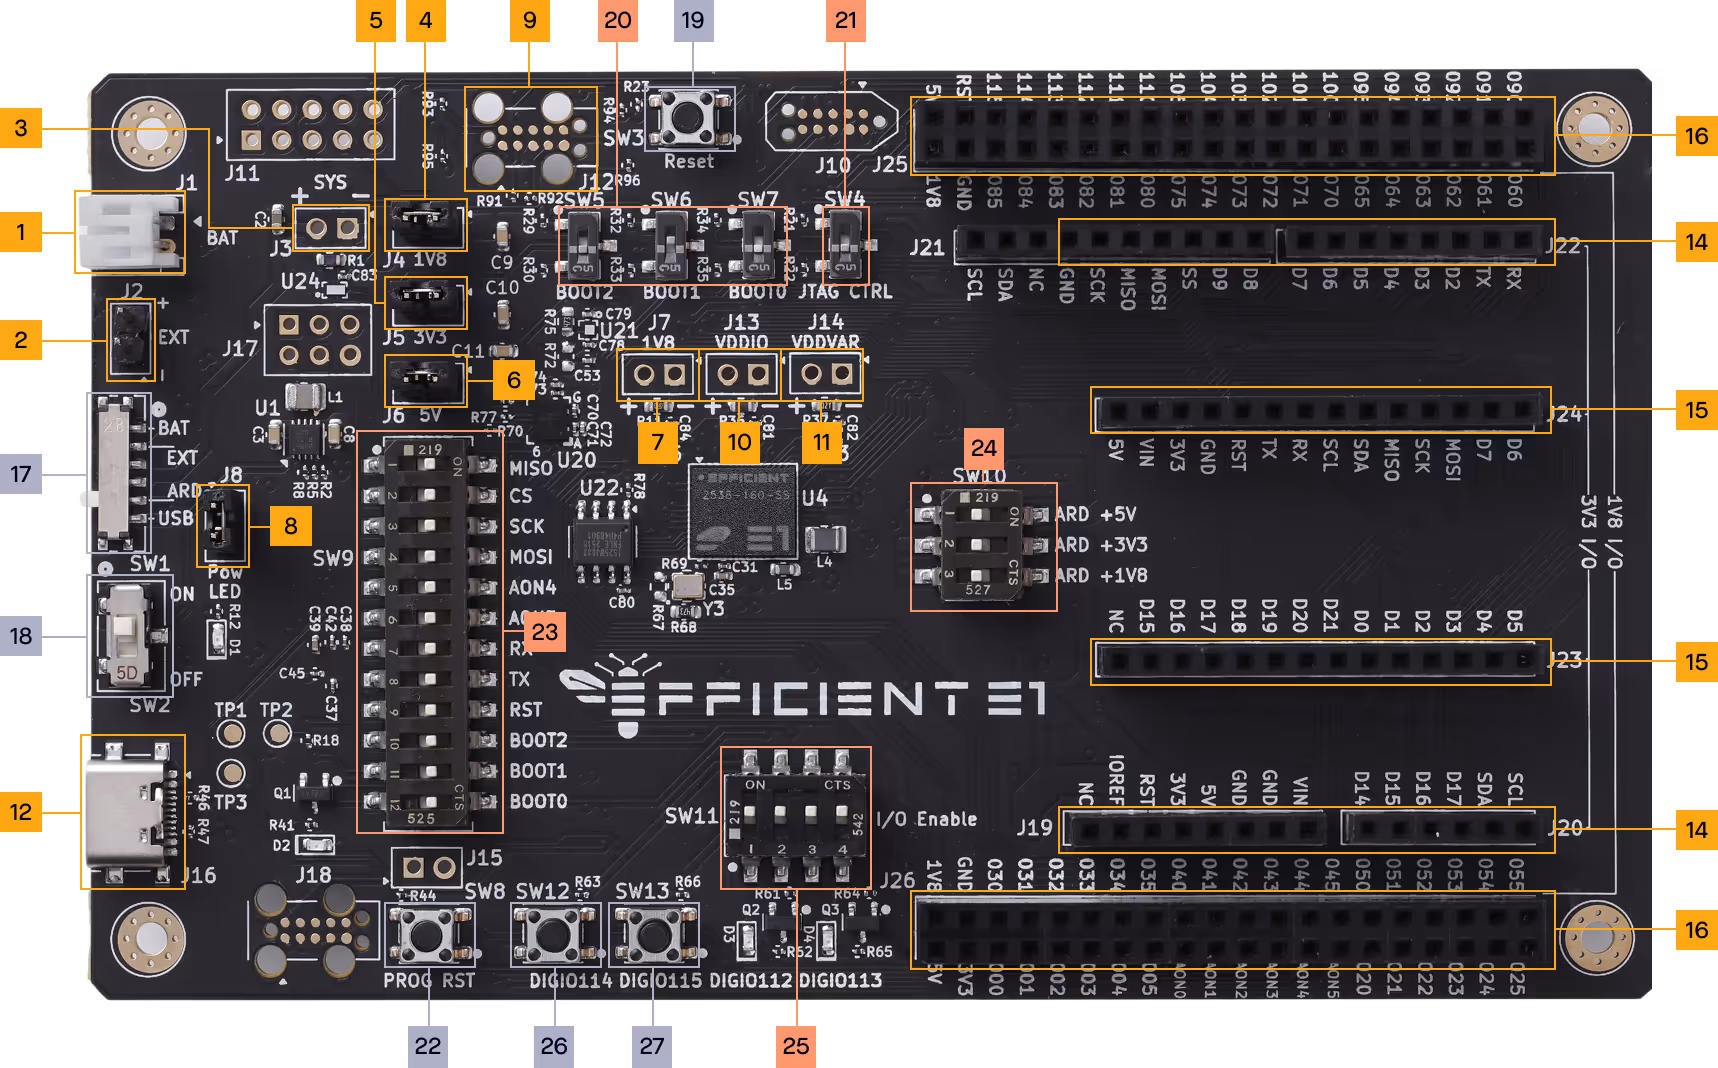
Jumper/switch positions and configurations
Latest resources

